16 Cleaning Mistakes You'd Never Realise You're Making
Cleaning isn’t everybody’s favourite task - it’s time-consuming, labour-intensive and can be downright unpleasant. But what if you’re making mistakes that are slowing you down and ensuring your home is less clean than it should be?
We’ve listed 16 common cleaning mistakes that you need to stop making to have a cleaner home in half the time.
Mistake 1: Cleaning from the ground up
Always begin cleaning a room by dealing with the tallest surfaces first, as dust and debris will fall down onto lower levels. Begin with lamp shades, picture frames, curtain rails and the tops of cabinets and shelving units, gradually working your way down until it’s time to tackle the floor. As you brush or hoover the floor you’re collecting all the stuff you pushed off the surfaces above. The benefit of this approach is most noticeable in the kitchen, with crumbs and various bits of food debris sure to end up on the floor as you wipe down dirty countertops.
Mistake 2: Using the same cleaning cloth around the house
While it’s not necessary to have a different cloth for each room, your kitchen and bathroom are breeding grounds for harmful bacteria and should each have their own cleaning tools to prevent cross-contamination.
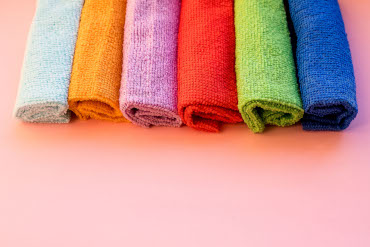
Sterilise your sponges and cloths
You should also make sure sponges and cloths are sterilised regularly. To do so, first rinse each item for 30 seconds in warm water to remove any dirt and debris, before going on to soak them in detergent or a diluted bleach solution for 5-10 minutes. Sponges may then be returned to use after a rinse under the tap, but microfibre and other cloths can be placed in the washing machine on a 60°c wash. Bear in mind that bleach will discolour cloths and can damage clothing, carpeting and soft furnishings, so it’s important to take care when using bleach-containing products around the house.
Rather than use bleach, it’s possible to zap 99.9% of bacteria by saturating sponges with warm water and placing them in a bowl in the microwave for 1-2 minutes. This shouldn’t be attempted with dishcloths as they’re likely to cause a fire if they aren’t sufficiently saturated with water, and sponges with metallic scrubbing pads shouldn’t be placed in the microwave either. Just as effective is placing sponges in the dishwasher along with your dishes, as long as you use the heated dry setting.
Mistake 3: Overloading the dishwasher
Overloading a dishwasher is the worst thing you can do for dishwasher performance. If you have overlapping crockery or plates crammed in too tight, water and detergent will struggle to reach dirty surfaces. Having to re-wash your crockery is a time-consuming task and isn’t great for the environment, so make sure there’s daylight between each item and that your cutlery is sufficiently spaced out in the basket to prevent ‘spooning’. Any unclean surfaces that water and detergent were unable to reach will require an energetic scrub rather than just another go round in the machine, as food debris may now be stuck firmly due to the high temperature it was exposed to during the drying cycle.
No need to pre-rinse your dishes
Another common dishwasher mistake is to thoroughly rinse items before placing them in the dishwasher. Dishwasher and detergent manufacturers advise against this - although it’s important to dispose of larger bits of food debris as these could clog your machine’s filters. Sticky carbs, egg and bread dough are also best removed, along with salad leaves as they can get stuck in crevices before drying firmly to surfaces.
Mistake 4: Using only dish soap on chopping boards
Washing up liquid has many uses around the home but it isn’t a disinfectant, and that’s no good if you’re cleaning a chopping board that’s been used for preparing raw meat and fish. Chopping boards can harbour various nasty bacteria, including E. coli, Salmonella and Staphylococcus, so it’s really important that your boards are properly sanitised after each use.
First, remove any debris remaining on the surface of the board by brushing it into the bin or sink disposal, before washing with warm water and dish soap. You can then apply a diluted bleach solution or other surface disinfectant, using a scrubbing brush to get into the knife groves and other nooks and crannies. If you’re using bleach, make sure you scrub carefully to avoid getting the solution on your clothes. Once you’re confident that the board has been disinfected, rinse thoroughly and dry with a clean tea towel or paper towel.
Don’t...
- leave wooden boards to soak as the wood will swell, causing the board to warp or even come apart; or
- put wood boards and utensils in the dishwasher. Plastic boards can be dishwashed just fine however.
Chopping boards used only for preparing vegetables don’t need to be disinfected as regularly as those used for cutting raw meat and fish, so colour-coded boards that indicate what each should be used for are an ideal way to avoid cross-contamination.
Mistake 5: Dusting surfaces with a feather duster or dry cloth
Feather dusters are great for getting at cobwebs and dust on difficult to reach surfaces, but they should be used sparingly as all they really do is move dust and dirt from one place to another. Likewise dry cloths, whereas a damp microfibre cloth will clean surfaces much more effectively, with dust and debris firmly adhering to it. This allows you to rinse any dust from your cloth before moving on to the next surface.
Rather than use water, you can use furniture polish on wood and veneered furniture, or a multi-surface cleaner on other surfaces. Another option is multi-surface wipes, but these are environmentally much less friendly than cleaning with a reusable microfibre cloth.
Mistake 6: Never cleaning the TV remote
In a busy household the TV remote can become a hub for bacteria, with studies showing that fecal matter and harmful bacteria will accumulate if the remote isn’t regularly cleaned. But how often do you clean yours? Have you ever cleaned it?

How to clean your TV remote
Before you start, make sure you remove the batteries from the remote. Dampen a small microfibre cloth with rubbing alcohol and thoroughly wipe down the entire remote, including the battery cavity and cover. Then dip a cotton bud in the rubbing alcohol and use it to clean anywhere you couldn’t reach with the cloth, taking care to get in between the buttons. Remove any excess moisture with a dry microfibre cloth or pat dry with a paper towel, and replace the batteries. Your TV remote is now bacteria free.
Mistake 7: Assuming the washing machine cleans itself
Dirt, clothing material, hair and excess detergent can all build up inside your washing machine - in the drum, around the gasket, on the door and in the detergent dispenser. If enough of this unpleasant gunk accumulates it can get back onto your clothes and make them smell.
How to clean your washing machine
Mix 60ml (1/4 cup) of baking soda with an equal measure of water before pouring the solution into the detergent dispenser. Then pour 500ml (2 cups) of white distilled vinegar into the drum and run the machine empty on its hottest cycle. When this is complete, remove the detergent drawer if possible and clean thoroughly. Wipe down the door/window, clean the gasket - making sure you get into all the nooks and crannies - and then tackle the space left by the detergent drawer. Give the exterior of the washing machine a spray with disinfectant and wipe down.
Mistake 8: Spraying directly onto surfaces
Spraying surface cleaner directly onto surfaces is a bad idea as it can drip into crevices and leave a build-up of cleaning solution. Using too much solution may leave streaks and could even damage your surfaces if you’re using harsh chemicals. The better approach is to spray solution onto a microfibre cloth or paper towel before wiping surfaces, then repeat as often as is required.
Mistake 9: Cleaning windows when it’s warm and sunny
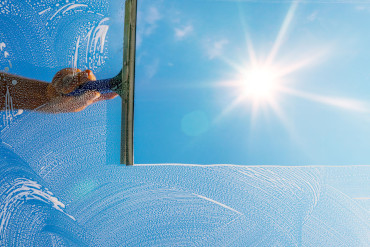
It’s when the sun comes out that your dirty windows look at their worst, but this isn’t the best time to clean them. Warm weather and direct sunlight will dry window cleaning solution as you apply it, making it difficult to prevent a streaky finish. Instead, wait until the late afternoon or early evening, when the sun’s rays are not as strong or no longer facing the windows you’re cleaning. If you’ve no choice but to clean your windows while the sun’s beating down, use a mixture of cool water and dishwashing liquid, as this won’t evaporate as quickly.
Ideally, you’d also use a window scrubber and squeegee, as this will ensure your windows are crystal clear and streak free. Once you’ve applied the solution and thoroughly scrubbed away any dirt, work horizontally with the squeegee from the top of the window pane to the bottom. The squeegee will gradually accumulate water, but you can just wipe it on the scrubber or a paper towel as you go. A microfibre cloth can then be used to remove any excess moisture from the edges and corners of the window.
Mistake 10: Putting the toilet brush straight back into the holder
If you return the toilet brush to its holder straight after you use it, the moisture will be trapped inside the holder, creating the perfect environment for bacteria to multiply.
Instead, sandwich the toilet brush handle between the toilet seat and basin, with any excess water dripping into the toilet. Once the brush is completely dry, return it to its holder.
Toilet brushes benefit from being regularly disinfected to prevent harmful bacteria from proliferating. One way to do this is to fill the holder with a diluted bleach solution and leave the brush inside for 5-10 minutes. Once this process is complete, rinse both the brush and holder thoroughly and follow the drying method described above. If this doesn’t do the trick, some brands of toilet brush allow you to replace just the brush head.
Mistake 11: Making your bed too early in the morning
We’ve been programmed from an early age to make our beds first thing in the morning, so not doing so may seem counterintuitive. Until you learn that a 2006 study suggests that making your bed can trap dust mites between the sheets.
Apparently, dust mites prefer to hang out in the dark, damp spaces in between your mattress and pillows or duvet. By airing your duvet and exposing your mattress to the sun, you’re making your bed less attractive to these tiny critters. Also bear in mind that the conditions favoured by dust mites are also perfect for bacteria and fungus.
Before the laziest among you rejoice at the idea of never making your bed again, how about you fold your duvet at the foot of the bed and stack your pillows on top, before making your bed later in the day if you prefer how a well-made bed looks? This is a cleaning blog afterall, so it wouldn’t feel right to suggest you leave your bed in a state!
Mistake 12: Not maintaining your cleaning tools
Poorly maintained cleaning tools could be hampering your efforts to clean your home. Using dirty tools and equipment means that you’re just moving dirt and bacteria around your home, leading to smeared surfaces and your family living in an unhealthy environment.
For example, a damp mop left to fester will become a breeding ground for bacteria. After each use your mop should be cleaned properly and rung out before being returned to a dry mop bucket. Likewise, cloths, sponges, scourers, scrubbing brushes and dustpans should be disinfected regularly to ensure they’re not being colonised by bacteria. Your vacuum should be emptied regularly and the filters cleaned to ensure that suction isn’t compromised. Bottle nozzles should be wiped to avoid them becoming clogged. Brooms should be stood with straws pointing up.
Mistake 13: Forgetting the sink needs cleaning too
You’d be forgiven for thinking your kitchen sink cleans itself due to the volume of cleaning products and running clean water that it’s exposed to, but neglecting your sink is a sure way to fill your kitchen with unpleasant odours. Whether your sink’s fitted with a standard drain or sink disposal unit, food waste can accumulate in conditions ripe for the proliferation of bacteria.
How to clean your kitchen sink
First, use dish soap and a sponge or soft cloth to clean the entire sink, including taps/faucets, the drain and any plugs or other sink accessories. Then boil the kettle and while you’re waiting, mix a teaspoon of baking soda with 60ml (1/4 cup) of lemon juice. Once the kettle’s boiled, pour the hot water down the drain to loosen any gunk that’s built up inside. Follow this by pouring the baking soda/lemon juice mixture all over the surface of the sink, leaving it to stand for approximately 10 minutes before rinsing.
If you have a blocked or very smelly drain, you may need to use drain unblocker, but regularly using the baking soda and lemon juice method should prevent you from having to use harsh chemicals in future.
Mistake 14: Not giving cleaning products time to work
Many cleaning products require a little time to work effectively, for example oven cleaner may need to be applied and left for several hours to do its thing. The same often applies to toilet cleaner, carpet stain remover and even some surface disinfectants.
That said, there are products that could harm your surfaces if left to sit too long, so make sure you read the instructions to ensure you’re using the product appropriately.
Mistake 15: Cleaning bare-handed
If harsh chemicals can harm your furniture then you can imagine what they might do to your skin if you don’t take precautions to avoid exposure.
A snazzy pair of Marigolds not only look the part but provide the perfect barrier between your hands and the various chemicals commonly found in household cleaning products. While some harsh chemicals will cause irritation immediately, many others will only do so over time, drying out your skin and causing contact dermatitis that may require medical attention. Rubber gloves also provide additional grip when cleaning and can prevent bacteria from coming into contact with your skin or building up under your nails.
Remember though, reusable gloves should also be disinfected regularly. Spray the outside with disinfectant before rinsing, then remove and wash them inside and out in dishwashing liquid to ensure they don’t harbour bacteria and become smelly from sweaty hands.
Mistake 16: Putting the cleaning off
And finally, the biggest mistake of all: putting it off because you don’t have time.
Spillages are much easier to deal with when they happen, before they turn into stains. A quick sweep of the kitchen floor after you’ve prepared food means that less stuff will get tracked through into other rooms. Regular drain maintenance means you’ll never have to resort to the plunger. Clutter should be cleared away daily, so when you do get to the weekly clean you don’t have to spend 30 minutes tidying.
A few moments cleaning as you go or tackling small issues before they become big ones makes the weekly clean so much easier.
Stay Connected
Want to hear more from The Cleaning Collective? Sign up to our mailing list for the latest offers and news
Stay Connected
Stay connected and be the first to know about our latest products, special offers, and exciting news:The Cleaning Blog
Want to learn more about cleaning? From the latest cleaning and hygiene news to handy how-to guides, why not check out our most popular blog categories.Stay Connected
Stay connected and be the first to know about our latest products, special offers, and exciting news: